Showing posts with label Azure. Show all posts

Wednesday, November 27, 2013

Continuous Deployment to Azure Web Sites via Visual Studio 2013 and VS Online

In principle, I appreciate the value of test-driven development (TDD) and continuous integration (CI) builds; I just didn’t think they would be entirely practical for my solo, side projects. Well, I don’t have any excuses anymore, I’ve been working on a quick project and in just a few hours, I had an AngularJS single page application (SPA) remotely building and deploying to an Azure web site. All for free. Every time I check-in a change, the source is copied to the cloud, my test runs and it triggers a CI build remotely and then is deployed automatically to the host server. Pretty slick.

image

One change was that testing web applications has come along from the dark days of having to wrangle with the HTTP context. Maybe the situation isn’t totally resolved, but it’s easier these days to write tests because the HTTP context isn’t so much of a stumbling block in newer frameworks.

I only ran into two issues setting everything up, and one was pretty much my fault. First, I created an ASP.NET MVC project using Visual Studio 2013 and added it to Visual Studio Online (which supports both Git and Team Foundation Services [TFS] online). As I wrote in a previous post, you can get free private Git repositories via Visual Studio Online.  I also created an Azure website and linked it to the project. I created a CI build profile and the build triggered correctly on check-in. No problems, no errors. However, the project was not being deployed. The issue was simple, I chose the wrong deployment template. I should have been using the AzureContinuousDeployment.11.xaml template.

The other issue was that the Visual Studio Online build machine wasn’t in sync with the NuGet updates, I had installed on my local box. To resolve these issues with package management, I Enabled NuGet Package Restore feature and then check-in the entire “packages” directory to resolve missing DLL errors.

To get this working for your project, you can start by reading the MSDN article about a continuous deployment setup.

BTW - If you don’t check in the package files, you’ll get error such as these (and more) because the remote build machine won’t be able to find the DLLs. To help with search, I'll paste in a bunch of the errors here.

Models\AccountModels.cs (11): The type or namespace name 'DbContext' could not be found (are you missing a using directive or an assembly reference?)App_Start\WebApiConfig.cs (5): The type or namespace name 'Newtonsoft' could not be found Controllers\AccountController.cs (7): The type or namespace name 'DotNetOpenAuth' could not be found Controllers\TodoController.cs (3): The type or namespace name 'Infrastructure' does not exist in the namespace 'System.Data.Entity' Controllers\TodoListController.cs (4): The type or namespace nam 'Infrastructure' does not exist in the namespace 'System.Data.Entity' Filters\InitializeSimpleMembershipAttribute.cs (3): The type or namespace name 'Infrastructure' does not exist in the namespace 'System.Data.Entity' Areas\HelpPage\SampleGeneration\HelpPageSampleGenerator.cs (14): The type or namespace name 'Newtonsoft' could not be found (are you missing a using directive or an assembly reference?) Models\TodoListDto.cs (6): The type or namespace name 'Newtonsof' could not be found Models\TodoList.cs (6): The type or namespace name 'Newtonsoft' could not be found Models\TodoItemContext.cs (16): The type or namespace name 'DbContext' could not be found Models\AccountModels.cs (18): The type or namespace name 'DbSet' could not be found Models\TodoItemContext.cs (23): The type or namespace name 'DbSet' could not be found C:\Windows\Microsoft.NET\Framework64\v4.0.30319\Microsoft.Common.targets (1605): Could not resolve this reference. Could not locate the assembly "EntityFramework". Check to make sure the assembly exists on disk. If this reference is required by your code, you may get compilation errors.C:\Windows\Microsoft.NET\Framework64\v4.0.30319\Microsoft.Common.targets (1605): Could not resolve this reference. Could not locate the assembly "DotNetOpenAuth.OAuth". Check to make sure the assembly exists on disk. If this reference is required by your code, you may get compilation errors.

C:\Windows\Microsoft.NET\Framework64\v4.0.30319\Microsoft.Common.targets (1605): Could not resolve this reference. Could not locate the assembly "DotNetOpenAuth.OAuth.Consumer".
C:\Windows\Microsoft.NET\Framework64\v4.0.30319\Microsoft.Common.targets (1605): Could not resolve this reference. Could not locate the assembly "DotNetOpenAuth.OpenId". C:\Windows\Microsoft.NET\Framework64\v4.0.30319\Microsoft.Common.targets (1605): Could not resolve this reference. Could not locate the assembly "DotNetOpenAuth.OpenId.RelyingParty". Check to make sure the assembly exists on disk. If this reference is required by your code, you may get compilation errors. C:\Windows\Microsoft.NET\Framework64\v4.0.30319\Microsoft.Common.targets (1605): Could not resolve this reference. Could not locate the assembly "DotNetOpenAuth.Core".
C:\Windows\Microsoft.NET\Framework64\v4.0.30319\Microsoft.Common.targets (1605): Could not resolve this reference. Could not locate the assembly "EntityFramework.SqlServer". C:\Windows\Microsoft.NET\Framework64\v4.0.30319\Microsoft.Common.targets (1605): Could not resolve this reference. Could not locate the assembly "Newtonsoft.Json". C:\Windows\Microsoft.NET\Framework64\v4.0.30319\Microsoft.Common.targets (1605): Could not resolve this reference. Could not locate the assembly "System.Web.Http.OData". C:\Windows\Microsoft.NET\Framework64\v4.0.30319\Microsoft.Common.targets (1605): Found conflicts between different versions of the same dependent assembly.

Monday, August 19, 2013

Installing GoREST on Ubuntu Linux

Previous posts on setting up a developer environment on an Ubuntu Linux virtual machine running on Windows Azure:
- Linux (Ubuntu) Virtual Machine on Windows Azure
- Remote Access to Ubuntu Linux VM on Windows Azure
- Installing LAMP on Ubuntu
- Installing Git on Ubuntu Linux

GoREST is a useful RESTful style web-services framework for the Go (golang) language. The commands to install GoREST are simple, but there’s more than one step involved. Although, having said that, this post will still be really light, so I’ll have to make sure I write another one soon with some GoREST examples. (Update: I wrote a post with some simple examples: GoREST (golang web services) Simple Examples)

First, you’ll need to install Mercurial so that you can run the “go get” command for GoREST:

$ sudo apt-get install mercurial

image

Next, run the command to install GoREST:

$ sudo go get code.google.com/p/gorest

The GoREST install is silent, so you won’t see any feedback.  My advice is to have a simple Hello World style example ready to go, so you can test your GoREST install.

Installing Go (golang) on Ubuntu Linux

Previous posts:
- Linux (Ubuntu) Virtual Machine on Windows Azure
- Remote Access to Ubuntu Linux VM on Windows Azure
- Installing LAMP on Ubuntu
- Installing Git on Ubuntu Linux

As part of my series on setting up a development environment on Ubuntu Linux running in Windows Azure, here are the steps to install and test the Go (golang) language.

First you have to SSH to your VM and install Go, which is super easy. Note that apt-get might not install the latest version of Go, see thread on Stack Overflow about installing latest version of Go.

$ ssh -p portnumber username@yourvmname.cloudapp.net
$
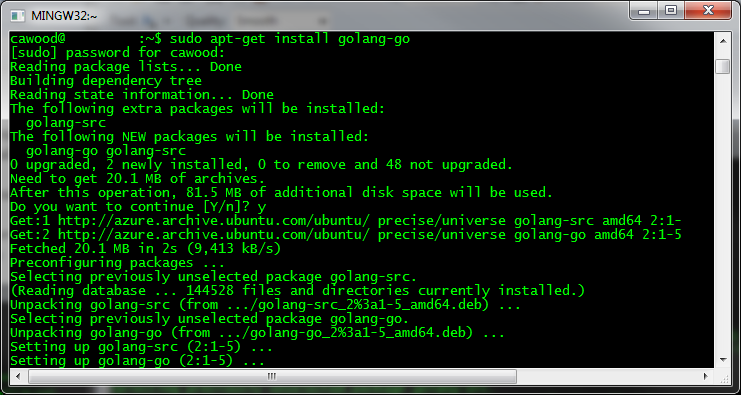
sudo apt-get install golang-go

image

You’ll be asking whether or not you’d like to participate in a program to track which packages are being installed.

image

To check that it’s installed, you can run: $ go version

You may want to do some additional customization. For more details, refer to this post: How to Install Google Go in Ubuntu by Joshua Price.

Sunday, August 18, 2013

Installing Git on Ubuntu Linux

Previous posts:
- Linux (Ubuntu) Virtual Machine on Windows Azure
- Remote Access to Ubuntu Linux VM on Windows Azure
- Installing LAMP on Ubuntu

I’ve been writing some posts about setting up a development environment for Ubuntu running on Windows Azure. Here’s the short post on getting Git source control working.

Install Git

Installing LAMP is easy, there isn’t a word for how easy it is to install Git. It’s one command and you’re done. Done with the install that is… you’ll need to do a little config and then clone a repository or initialize one.

$ sudo apt-get install git

image

Once you’ve got your install done, you can quickly configure your user settings with these commands.
$ git config --global user.name NewUser
$ git config --global user.email

Check your Git install

Where is Git installed?

$ which git

What’s your config?

$ git config –list

Start Using Git by Cloning a Repository

Clone your repository to a directory (for example, from GitHub):
$ git clone git@github.com:whatever folderName
Note that you don’t have to pay for a private repository. See my post on a Free Private Git Repository Using TFS Online Git Integration. (Need help? See Cloning a Git Repository.)
Also, if you’re new to Git, keep in mind that you can get the Pro Git book for free.

Saturday, August 17, 2013

Installing LAMP on Ubuntu Linux

Previous posts:
- Linux (Ubuntu) Virtual Machine on Windows Azure
- Remote Access to Ubuntu Linux VM on Windows Azure

Installing the rest of the L.A.M.P. stack (Linux, Apache, MySQL, PHP) on a Windows Azure Ubuntu image is remarkably simple. You simply need to run two commands. First install tasksel and then run tasksel to install the lamp-server package. It’s so easy that I’m also including instructions for testing that each component is installed and running correctly.

cawood@ubuntu:~$ sudo apt-get install tasksel

(At this point, you may be told that you can run sudo apt-get autoremove to get rid of walinuxagent-data-saver. This is optional.)

cawood@ubuntu:~$ sudo tasksel install lamp-server

image

After you’ve installed the LAMP stack, you can test that each component is working.

Testing the Apache Web Server Install

First you can simply test that the index file exists by running these commands:

$ cd /var/www
$ cat index.html

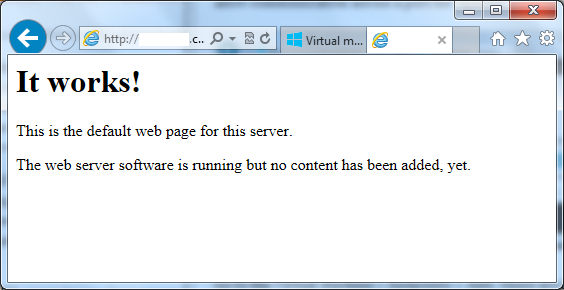
<html><body><h1>It works!</h1>
<p>This is the default web page for this server.</p>
<p>The web server software is running but no content has been added, yet.</p>
</body></html>

To start editing your index page, you can run:

$ sudo nano index.html

On Azure, you must create an endpoint for the Apache port. This opens the Azure firewall to allow communication across a port for Apache.

image

Go to the Virtual Machine > Endpoints > Add. These are the standard values: name: http, protocol: tcp, public port :80, private port: 80. Once you’ve created the endpoint, you can browse to your new Apache server.

image

Test your MySQL Install

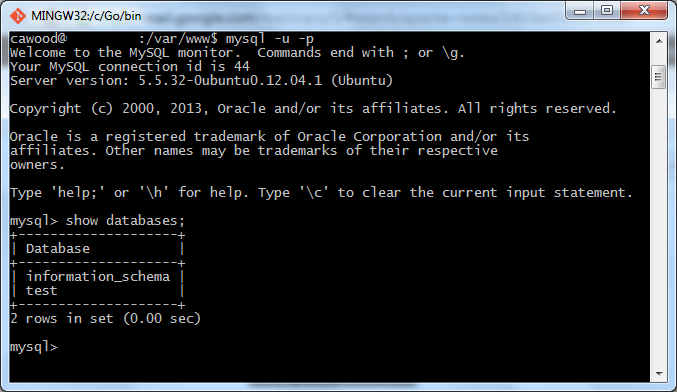
To make sure your MySQL install is working, simply run mysql and then type show databases; and press Enter. Couldn’t be easier. The result should look the window below.

image

Test PHP on your Server

Finally, to test your PHP install, you’ll need to create a file and then launch it in your favourite browser. Maybe because I'm nostalgic about the days of Pine, I’m a fan of the  GNU nano editor, so I use this command:

$ sudo nano /var/www/info.php

Add this content to the file:

<?php
phpinfo();
?>

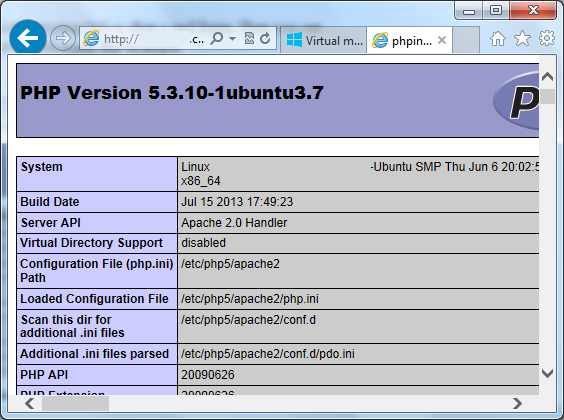
After you’ve made your changes, Save and Exit by typing Ctrl+x, then y and Enter. Then you can open the info.php page using your machine IP or DNS name. For example, http://myvm.cloudapp.net/info.php.

image


There you go. The LAMP stack running on Windows Azure.

Tuesday, August 13, 2013

Remote Access to Ubuntu Linux VM on Windows Azure

Previous post: Linux (Ubuntu) Virtual Machine on Windows Azure

I was getting ready to write a post about connecting remotely to Ubuntu running on Windows Azure, when I found this post: Remote Desktop to Ubuntu in Windows Azure. Unfortunately, it doesn’t work with Ubuntu 13.4 (Raring Ringtail); which just happens to be the image I choose to install in my virtual machine. Rather than wrestle with it any longer, I’ve decided to create a new VM using the Ubuntu 12.04 LTS Server (Precise Pangolin) image.

You may wonder why anyone would bother setting up remote access since you can SSH into the machine remotely and do everything through the command line. For me, the answer is quite simple, I want another way to connect in case something goes wrong. I’ve had VMs get into bad states (both one Amazon AWS EC2 and Windows Azure), so I’d like the option to connect as many ways as possible.

Note: I've used the Ubuntu 12.04 LTS server image since newer versions of the Ubuntu Unity desktop don't have a 2D mode and therefore are difficult to use with remote client software. If someone has the solution to this issue, please leave a comment.

[Update: Of course, you fist have to set up SSH: How to Use SSH with Linux on Windows Azure. You should create an SSH key first and associate the certificate (*.pem file) with the VM when you create the VM.]

To get remote access to 12.04, here are the steps:

1. Connect using SSH. I like the Git Bash terminal that comes with the Git install. PuTTY is also a good SSH client.

2. Install a desktop. This command will take a while, so get yourself a cup of joe... and feel free to make it a grande.

sudo apt-get install ubuntu-desktop

image

3. Install XRDP/ VNC Server.

sudo apt-get install xrdp

4. In the Azure Management Portal, create a VM endpoint for XRDP. 3389 is the default port.

5. Use the "Connect" button from the Azure portal to download an RDP shortcut for your VM.

image

6. Open the shortcut and login.

image

Here are a couple of other posts on this topic:
http://azurecoder.azurewebsites.net/tag/ssh-to-linux-virtual-machine/
http://www.liberiangeek.net/2012/05/connect-to-ubuntu-12-04-precise-pangolin-via-windows-remote-desktop/

Monday, April 29, 2013

Linux (Ubuntu) Virtual Machine on Windows Azure

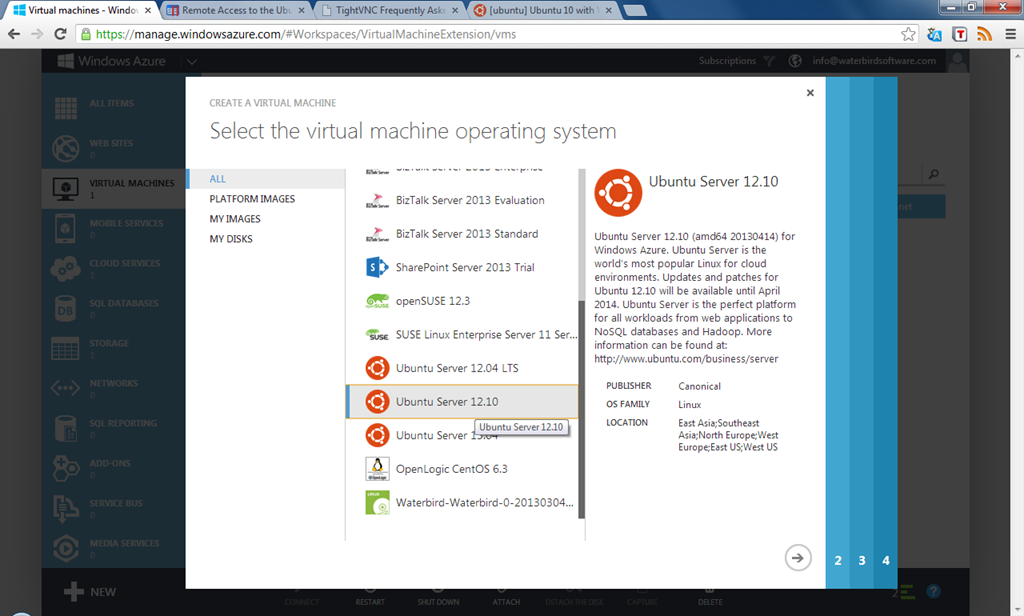
Creating (it’s hard to write “installing”) a Linux virtual machine on Windows Azure is remarkably simple. It’s just a matter of choosing the O/S and configuration you want from a gallery of options.

The whole process takes a few minutes and under the BizSpark start-up program, it’s possible to get access to Windows Azure for free.

AzureLinuxVMCreate
- choosing to create an Ubuntu virtual machine in Windows Azure

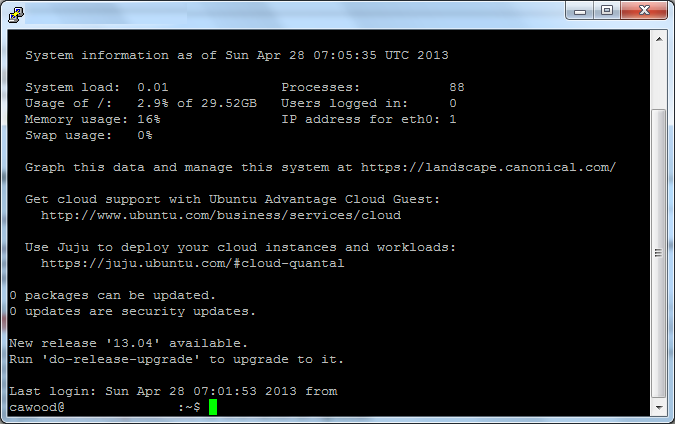
After creating the VM, you can connect easily from Windows by downloading PuTTy SSH.

PuttyConnected
- connecting to Linux on Azure using PuTTy

Full instructions for creating a Linux Virtual Machine on Windows Azure can be found on the Windows Azure website.

Wednesday, August 08, 2012

Enabling Remote Access to SQL Server on an Azure VM

The basic requirements for enabling remote access to SQL Server are pretty straightforward:

1. Ensure that “Allow Remote Connections” is enabled in SQL Server Management Studio.

2. Open your firewall to allow communication (by default TCP port 1433).

To get access to your SQL Server running on a Windows Azure Virtual Machine (VM), you need to take some additional steps—just as you would using an Amazon Web Services virtual machine. The same is true for opening HTTP access (e.g., over port 80), or any other port for that matter.

Note: This post is not about SQL Azure. This applies to an install of SQL Server on a Windows Azure Virtual Machine.

  1. First login to the new Azure Management Portal (currently in “Preview).

image

2. Click on the Virtual Machine you want to configure and then click “Endpoints.”

image

3. By default, SQL Server will use TCP port 1433, so add an endpoint with any name (using the allowed characters and character limit).

(I haven’t read up on it yet, but I’m assuming the public port is what you’ll be using from the outside and the private port is the one that will actually be forwarded to the VM. To keep it simple, I left them the same in my test.)

That’s it, you’re done! Now you can connect from a client machine to your remote SQL Server machine.

Saturday, August 13, 2011

Announcing GovernanceHx – SharePoint Governance for Everyone!

I recently read an article that proclaimed--without any grey area--that Microsoft SharePoint governance has nothing to do with technology. I certainly understand the sentiment. Governing an enterprise platform such as SharePoint can be complicated and requires planning and buy-in from various people. However, I also believe that giving SharePoint users access to the right tools can empower them to keep track of whether their governance plans are being effectively enforced. To put it succinctly, wouldn’t you rather know right away about issues than wait until someone decides to proactively check for them?


In my vast spare time (for those who don’t know me, that’s a joke), I’ve been working on a SharePoint community application that I’m now ready to start talking about.

GovernanceHx is a web application that is bringing SharePoint governance to the Cloud. The application allows any SharePoint user to run free, read-only reports against their SharePoint servers with the express purpose of combatting SharePoint sprawl. This means that people without admin access, or development skills, can easily generate reports about the growth of their environment and use them to gain an insight into changes over time. This is why I chose to go with the name GovernanceHx. “Hx” is commonly used in the health care field as the abbreviation for history. GovernanceHx shows the governance health of your SharePoint server over time.

image
- A report results page from GovernanceHx

At this time, I’m showing some demos and recruiting a few SharePoint experts to be Governance Advisors on the project. I’m happy to announce that SharePoint expert and prolific conference speaker, Richard Harbridge, has joined the project as the first Governance Advisor.

Custom image

These advisors will help shape the future of the project by using their real-world SharePoint experience to identify the best application of the GovernanceHx framework. Since GovernanceHx tracks growth, the advisors will help figure out which growth reports will be most useful.
image 
And speaking of frameworks, that’s one of the coolest aspects of this project. I’ve developed the GovernanceHx reporting framework using Windows Azure, so users will not need to install anything at all on their SharePoint server to run reports against Office 365 or any SharePoint sites that are accessible over the net.

logo-office-365[1] 

Cloud-based SharePoint governance opens up all sorts of possibilities for Office 365/SharePoint online customers. For example, I’m sure there are plenty of small to medium businesses that would like a solution to help with their governance enforcement but simply can’t afford a large enterprise reporting application for the job. GovernanceHx will be the low friction way for these users to discover sprawl issues before they become unmanageable.

Monday, July 11, 2011

Canadian Microsoft Azure ISV Twitter Account and Blog

Microsoft canadian ISV blog


“I See Value,” the Canadian Microsoft Azure ISV blog, now has a Twitter account @ISeeValue.


On the Canadian Microsoft Azure ISV blog, read about Connect2Fans, a BizSpark Startup that has developed a solution to help artists, writers and other people in the arts and entertainment industry who find it difficult to connect directly with their fans.

Sunday, July 10, 2011

Windows Azure Table has Phantom Columns

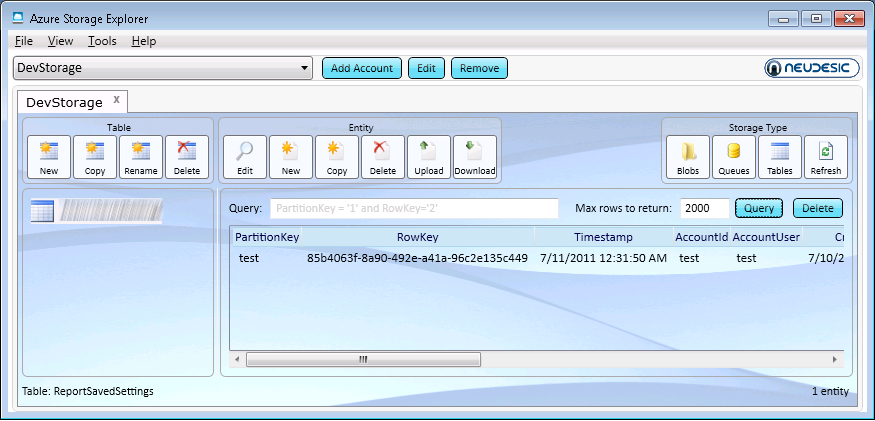
While working on my Windows Azure application this weekend, I ran into an issue that had me stumped for a few minutes until Neudesic’s Azure Storage Explorer helped me attain the moment of clarity that brought the resolution to me.

The issue I was running into was that one of my Azure tables was showing a number of columns that I wasn’t using. The answer was quite simple—I WAS using them in the past. Therefore, even if I deleted all the rows in the table, I wasn’t removing those old columns and they were showing null data.

image

- You can download Neudesic’s Azure Storage Explorer from www.codeplex.com.

In this case, it didn’t show my anything other than my Azure table had empty columns that I didn’t think I was adding, but that was enough for me to ‘see’ the issue.

Sunday, June 19, 2011

Azure Blob.FetchAttributes Throws “The specified blob does not exist.”

I was working on a Windows Azure application this weekend and I ran into a strange error. I was trying to access the metadata associated with blobs using (blob.FetchAttributes()) and received an error message. The problem was actually that the metadata wasn’t being associated properly with the blobs, so there was nothing to return. However, the error thrown was, “The specified blob does not exist.” Needless to say, I found this to be strange.

My solution was to check the metadata count before trying to fetch any metadata. This allowed my code to return blank results rather than throw a misleading error.

// Check for the case where attributes haven't been set
if (blob.Attributes.Metadata.Count > 0)
{
     blob.FetchAttributes();
}

Update: Upon further investigation, I found that this didn’t work even when the BLOB metadata was properly set. If you run into this, check that you’re blob container reference isn’t null.

Sunday, May 08, 2011

Azure Debugging Database Error

To set up the ability to debug Windows Azure projects in Visual Studio, you need to first run the “dsinit” command line utility (C:\Program Files\Windows Azure SDK\v1.2\bin\devstore>dsinit) which comes with the Windows Azure tools for Visual Studio. I recently ran into an issue where dsinit would not create the SQL Server Express database that would be used for debugging Azure projects.

dsinit

The error is “Failed to create database ‘DevelopmentStorageDb20090919’: User does not have permission to perform this action. One or more initialization actions failed. The development storage cannot be used without resolving these errors.”

The issue was that the user logged into Windows did not have the “dbowner” right in SQL Express. It was also necessary to add the “sysadmin” right so that the user could set permissions once the database was created.

dsinit2

After adding sufficient rights in SQL Server Management Studio to the SQL Express database, dsinit successfully completed.

dsinit3

Sunday, May 01, 2011

Windows Azure Debugging Issue with SQL Server

I was working on a Windows Azure application today and when I tried to debug, I found that I was being stopped by the error below. I happen to have the full version of SQL Server on the machine in question, so my haughty first response was that I wasn’t going to install something else, but after trying the recommended approach, the simplest solution was to just install SQL Server Express.

Windows Azure Tools: Failed to initialize Development Storage service. Unable to start Development Storage. Failed to start Development Storage: the SQL Server instance ‘machinename\SQLExpress’ could not be found. Please configure the SQL Server instance for Development Storage using the ‘DSInit’ utility in the Windows Azure SDK.

I found this blog post that gives a lot of helpful info about the issue: http://blogs.msdn.com/b/sql_protocols/archive/2007/05/13/sql-network-interfaces-error-26-error-locating-server-instance-specified.aspx. I first checked the firewall and that wasn’t the issue. Then I used the utility referenced on this page to check SQL connectivity.


image

Sure enough, the SQL Browser service was disabled (it showed NOT LISTENING). I started the service and was able to get past the original error message. I then ran DSInit to specify my SQL instance.


image

However, after running DSInit and specifying my SQL instance, I got the error below which advised me to install SQL Server Express. Fine. I did and it worked.

Server Error in '/' Application.


A network-related or instance-specific error occurred while establishing a connection to SQL Server. The server was not found or was not accessible. Verify that the instance name is correct and that SQL Server is configured to allow remote connections. (provider: SQL Network Interfaces, error: 26 - Error Locating Server/Instance Specified)

SQLExpress database file auto-creation error:

The connection string specifies a local Sql Server Express instance using a database location within the application's App_Data directory. The provider attempted to automatically create the application services database because the provider determined that the database does not exist. The following configuration requirements are necessary to successfully check for existence of the application services database and automatically create the application services database:

…

3. Sql Server Express must be installed on the machine.

…

image

Update: I haven't tried it, but I hear I'm supposed to use "/sqlserverinstance." to use the full version of SQL Server.