Showing posts with label Linux. Show all posts

Tuesday, April 21, 2020

Running NPM in Windows Terminal Ubuntu profile

I got some nasty errors when I tried to use NPM and Node.js in the new Windows Terminal for Windows 10 (which BTW has a cool split-pane feature that might just make it my new goto terminal).

The errors looked like this:

 not foundram Files/nodejs/npm: 3: /mnt/c/Program Files/nodejs/npm:
: not foundram Files/nodejs/npm: 5: /mnt/c/Program Files/nodejs/npm:
/mnt/c/Program Files/nodejs/npm: 6: /mnt/c/Program Files/nodejs/npm: Syntax error: word unexpected (expecting "in")

Here's the fix

$ sudo apt-get update
$ sudo apt-get install -y nodejs
$ sudo apt-get install build-essential
$ sudo apt get install npm
**CLOSE AND REOPEN TERMINAL**

I found it here: https://github.com/microsoft/WSL/issues/1512

BTW -- example split-pane keys: Alt+Shift+-, Alt+Shift+= will split horizontally and vertically.

Wednesday, December 18, 2013

Installing Ruby on Rails in Ubuntu 12.04 on Azure

In previous posts, I covered installing Ubuntu on Windows Azure, remotely accessing Linux from Windows Azure, installing LAMP and installing Git on Linux and a few other topics. The next subject I’ll be writing about is the Ruby on Rails web development platform.

There are some great resources out there for learning Ruby and Rails, and when the install goes smoothly, it’s very easy. I’m not an expert on Ruby, but the install didn’t go swimmingly for me, so I’m writing this post.

Step 1 – Install RVM and Ruby

\curl -L https://get.rvm.io | bash -s stable --ruby

Ruby Version Manager (RVM) is a great tool for working with Ruby. You can even run multiple versions of Ruby and easily switch back and forth.

image

Step 2 – Install Rails

Finally, you can use RubyGems to install rails:

gem install rails (may need sudo, I had to run it with both, see note below)

Note: if you see the error, ERROR:  Error installing rails: activesupport requires Ruby version >= 1.9.3.”, (or some other version) install Ruby 1.9.3 (Yes, even if you have a newer version installed) then use RVM to set the old version as the default using: rvm use ruby-1.9.3. This caused me much angst today. You can use ruby –v to see which version you’re running and rvm list to see the installed versions.

I also ran into this ugly error:

cawood@cawood:~$ rails --version
/usr/lib/ruby/1.9.1/rubygems/dependency.rb:247:in `to_specs': Could not find railties (>= 0) amongst [activesupport-4.0.2, atomic-1.1.14, bigdecimal-1.1.0, bundler-1.3.5, bundler-unload-1.0.2, executable-hooks-1.2.6, gem-wrappers-0.9.2, i18n-0.6.9, io-console-0.3, json-1.5.5, minitest-4.7.5, minitest-2.5.1, multi_json-1.8.2, rake-0.9.2.2, rdoc-3.9.5, rubygems-bundler-1.4.2, rvm-1.11.3.8, thread_safe-0.1.3, tzinfo-0.3.38] (Gem::LoadError)
        from /usr/lib/ruby/1.9.1/rubygems/dependency.rb:256:in `to_spec'
        from /usr/lib/ruby/1.9.1/rubygems.rb:1210:in `gem'
        from /usr/local/bin/rails:18:in `<main>'

I had to run gem install rails (with no sudo) to get all the gems to install properly. After I did that, I could see that Rails was installed properly:

cawood@cawood:~$ rails --version
Rails 4.0.2

Of course, my list of installed gems was much longer because the missing gems had been installed. It should look like this:

cawood@cawood:~$ gem list

*** LOCAL GEMS ***

actionmailer (4.0.2)
actionpack (4.0.2)
activemodel (4.0.2)
activerecord (4.0.2)
activerecord-deprecated_finders (1.0.3)
activesupport (4.0.2)
arel (4.0.1)
atomic (1.1.14)
bigdecimal (1.1.0)
builder (3.1.4)
bundler (1.3.5)
bundler-unload (1.0.2)
erubis (2.7.0)
executable-hooks (1.2.6)
gem-wrappers (0.9.2)
hike (1.2.3)
i18n (0.6.9)
io-console (0.3)
json (1.5.5)
mail (2.5.4)
mime-types (1.25.1)
minitest (4.7.5, 2.5.1)
multi_json (1.8.2)
polyglot (0.3.3)
rack (1.5.2)
rack-test (0.6.2)
rails (4.0.2)
railties (4.0.2)
rake (0.9.2.2)
rdoc (3.9.5)
rubygems-bundler (1.4.2)
rvm (1.11.3.8)
sprockets (2.10.1)
sprockets-rails (2.0.1)
thor (0.18.1)
thread_safe (0.1.3)
tilt (1.4.1)
treetop (1.4.15)
tzinfo (0.3.38)

Alternate Method—This didn’t work for me on Ubuntu 12.04

Step 1 – Install Ruby

You can either install the standard version: sudo apt-get install ruby-full build-essential
or the minimal requirements with: sudo aptitude install ruby build-essential libopenssl-ruby ruby1.8-dev (note the version number – you’ll have to update that).

I’m going with the first option to install ruby-full.

image

Step 2 – Install the Ruby Version Manager

CAUTION: Normally you would just run: sudo apt-get install ruby-rvm

However, there is an issue with the Ubuntu RVM package, so you should run this instead: \curl -L https://get.rvm.io | bash -s stable --ruby --autolibs=enable --auto-dotfiles

If you do run into issues with RVM. For example, using rvm use doesn’t change to the version you want, you can run these commands to clean your system (see this thread).

sudo apt-get --purge remove ruby-rvm
sudo rm -rf /usr/share/ruby-rvm /etc/rvmrc /etc/profile.d/rvm.sh


Then, open new terminal and validate environment is clean from old RVM settings (should be no output):


env | grep rvm


Step 3 – Check that You’re Using the Latest Version of Ruby


ruby –v will show you which version you’re using.


If you’re not using the one you want, you can use RVM to upgrade. This will download the source that is then used by RVM in the next step to compile and install Ruby; it is not a quick command.


sudo rvm install ruby-1.9.3-p125


or


sudo rvm install ruby-1.9.3 (Note version number)


However, if you do the second option, you may need to workaround an issue before updating. If you try to install ruby-1.9.3, you might get the error: “ERROR: The requested url does not exist: 'ftp://ftp.ruby-lang.org/pub/ruby/1.9/ruby-1.9.3-.tar.bz2' from RVM. You can workaround this by downloading the package yourself.”


sudo curl -o /usr/share/ruby-rvm/archives/ruby-1.9.3-.tar.bz2 \http://ftp.ruby-lang.org/pub/ruby/1.9/ruby-1.9.3-p0.tar.bz2


Check that you’re using the latest Ruby: ruby -v

If not, switch to the latest using RVM: rvm use 1.9.3


Step 4 – Install Rails


Finally, you can use RubyGems to install rails:


sudo gem install rails


Step 5 – Install a Web Server


I use Apache and MySQL, so the LAMP install works for me, but there are other options such as WEBrick or Lighttpd.


Other posts on this topic:


RubyOnRails.org getting started


Ubuntu documentation – Ruby on Rails


Friday, September 13, 2013

Scripting Regular Expressions Find/Replace in Sublime Text

Just like everyone in the software industry, I’ve used many, many different text editors over the years.  vi, Emacs, Notepad, Notepad++, TextPad, nano, gedit… to name a few. But, of course, there is a ridiculously long list of text editors and I haven’t tried that many of them. The one that I’ve been working in for most of this year is Sublime Text. Sublime’s tag line is “Sublime Text: The text editor you’ll fall in love with.” I may not be in love yet, but I’m definitely checking it out a lot.

In addition to having excellent functionality built-in, Sublime also supports a plug-in model. There is the GoSublime plug-in for golang code and there’s the RegReplace plug-in that allows one to write find/replace commands using regular expressions and save them in script as Command Palette commands.

To install RegReplace on Windows:

Step 1: Install Package Control for Sublime Text

As you can see in the installation instructions for Package Control  for Sublime Text, all you have to do is open a Sublime Text console (Ctrl+`) and paste in the install code.

Step 2: Install RegReplace for Sublime Text

image

Option 1: After installing package manager, download RegReplace, unzip it and paste the unzipped folder into your Packages folder (e.g., C:\…\Sublime Text 3\Packages). Next, go to Preferences > Package Control and choose “Package Control: Install Package.” Then choose the package you want to install from the list.

Option 2: This requires you have Git. Open a command prompt. CD to your Sublime Text 3 packages directory, then enter the following command:

git clone -b ST3 https://github.com/facelessuser/RegReplace.git RegReplace

Step 3: Add a Default.sublime-commands file -- with your command added

I had to manually create the folder: C:\Users\username\AppData\Roaming\Sublime Text 3\Packages\RegReplace

Once you have the file, you can add your own custom commands. (Remember to add a comma to the command above.)

   // Test RegReplace
     {
         "caption": "Reg Replace: Test",
         "command": "reg_replace",
         "args": {"replacements": ["test_reg_replace"]}
     },

Step 4: Add your custom command to the Command Palette

To do this, choose Tools > Command Palette > Then type “setting” and you’ll see “Preferences: Reg Replace Settings – User.” Choose this option and paste the example one that comes with RegReplace into the new file that’s created.

This will create the file: /C/Users/username/AppData/Roaming/Sublime Text 3/Packages/RegReplace/reg_replace.sublime-settings

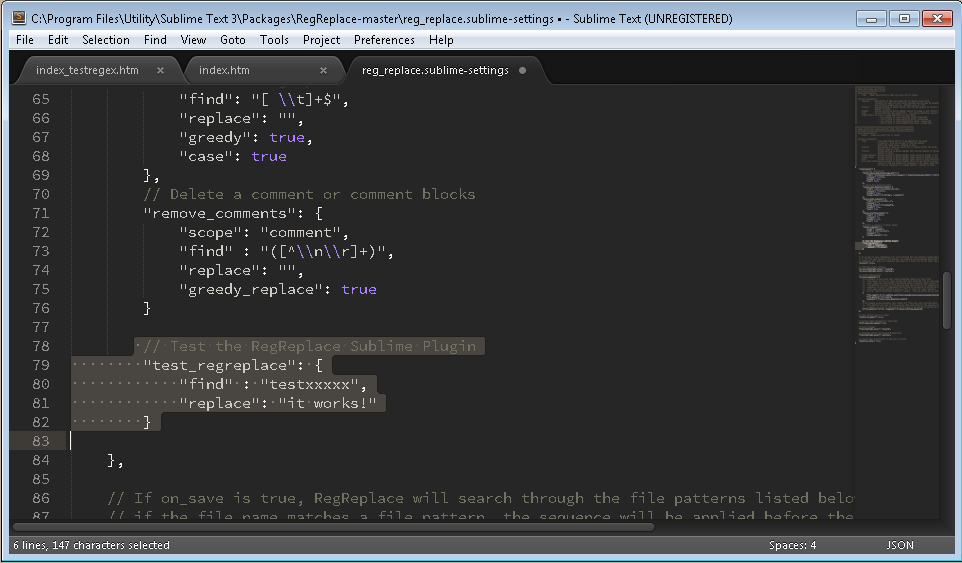
After the file is created, add a new command to reg_replace.sublime.settings. For example:

// Test the RegReplace Sublime Plugin
    "test_reg_replace": {
    "find" : "testxxxxx",
    "replace": "it works!"
   }

image

Step 5: Try it out!

Once you have everything set up, you can use the Command Palette to run your new custom find/replace regular expressions scripts.

image

Note: After installing RegReplace, I received the an error when trying to add my test code to reg_replace.sublime.settings. The error was something like “Cannot save. Can’t create .tmp file in RegReplace folder.” To work around the issue, I opened the security settings for the folder and added write permissions for all users. A bit overkill, but in my case, it’s a secure machine.

Monday, August 19, 2013

Installing GoREST on Ubuntu Linux

Previous posts on setting up a developer environment on an Ubuntu Linux virtual machine running on Windows Azure:
- Linux (Ubuntu) Virtual Machine on Windows Azure
- Remote Access to Ubuntu Linux VM on Windows Azure
- Installing LAMP on Ubuntu
- Installing Git on Ubuntu Linux

GoREST is a useful RESTful style web-services framework for the Go (golang) language. The commands to install GoREST are simple, but there’s more than one step involved. Although, having said that, this post will still be really light, so I’ll have to make sure I write another one soon with some GoREST examples. (Update: I wrote a post with some simple examples: GoREST (golang web services) Simple Examples)

First, you’ll need to install Mercurial so that you can run the “go get” command for GoREST:

$ sudo apt-get install mercurial

image

Next, run the command to install GoREST:

$ sudo go get code.google.com/p/gorest

The GoREST install is silent, so you won’t see any feedback.  My advice is to have a simple Hello World style example ready to go, so you can test your GoREST install.

Installing Go (golang) on Ubuntu Linux

Previous posts:
- Linux (Ubuntu) Virtual Machine on Windows Azure
- Remote Access to Ubuntu Linux VM on Windows Azure
- Installing LAMP on Ubuntu
- Installing Git on Ubuntu Linux

As part of my series on setting up a development environment on Ubuntu Linux running in Windows Azure, here are the steps to install and test the Go (golang) language.

First you have to SSH to your VM and install Go, which is super easy. Note that apt-get might not install the latest version of Go, see thread on Stack Overflow about installing latest version of Go.

$ ssh -p portnumber username@yourvmname.cloudapp.net
$
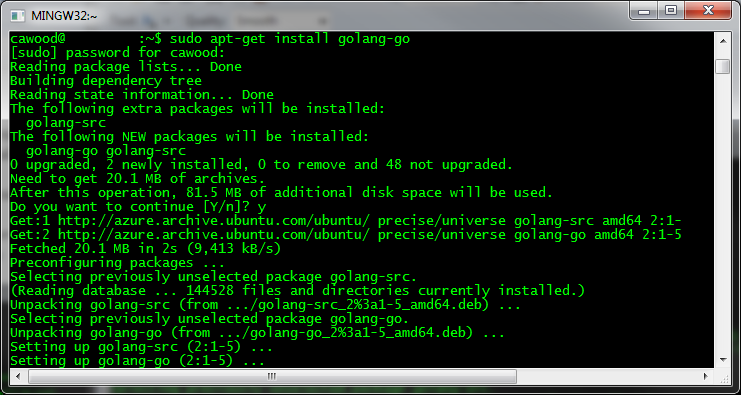
sudo apt-get install golang-go

image

You’ll be asking whether or not you’d like to participate in a program to track which packages are being installed.

image

To check that it’s installed, you can run: $ go version

You may want to do some additional customization. For more details, refer to this post: How to Install Google Go in Ubuntu by Joshua Price.

Sunday, August 18, 2013

Installing Git on Ubuntu Linux

Previous posts:
- Linux (Ubuntu) Virtual Machine on Windows Azure
- Remote Access to Ubuntu Linux VM on Windows Azure
- Installing LAMP on Ubuntu

I’ve been writing some posts about setting up a development environment for Ubuntu running on Windows Azure. Here’s the short post on getting Git source control working.

Install Git

Installing LAMP is easy, there isn’t a word for how easy it is to install Git. It’s one command and you’re done. Done with the install that is… you’ll need to do a little config and then clone a repository or initialize one.

$ sudo apt-get install git

image

Once you’ve got your install done, you can quickly configure your user settings with these commands.
$ git config --global user.name NewUser
$ git config --global user.email

Check your Git install

Where is Git installed?

$ which git

What’s your config?

$ git config –list

Start Using Git by Cloning a Repository

Clone your repository to a directory (for example, from GitHub):
$ git clone git@github.com:whatever folderName
Note that you don’t have to pay for a private repository. See my post on a Free Private Git Repository Using TFS Online Git Integration. (Need help? See Cloning a Git Repository.)
Also, if you’re new to Git, keep in mind that you can get the Pro Git book for free.

Saturday, August 17, 2013

Installing LAMP on Ubuntu Linux

Previous posts:
- Linux (Ubuntu) Virtual Machine on Windows Azure
- Remote Access to Ubuntu Linux VM on Windows Azure

Installing the rest of the L.A.M.P. stack (Linux, Apache, MySQL, PHP) on a Windows Azure Ubuntu image is remarkably simple. You simply need to run two commands. First install tasksel and then run tasksel to install the lamp-server package. It’s so easy that I’m also including instructions for testing that each component is installed and running correctly.

cawood@ubuntu:~$ sudo apt-get install tasksel

(At this point, you may be told that you can run sudo apt-get autoremove to get rid of walinuxagent-data-saver. This is optional.)

cawood@ubuntu:~$ sudo tasksel install lamp-server

image

After you’ve installed the LAMP stack, you can test that each component is working.

Testing the Apache Web Server Install

First you can simply test that the index file exists by running these commands:

$ cd /var/www
$ cat index.html

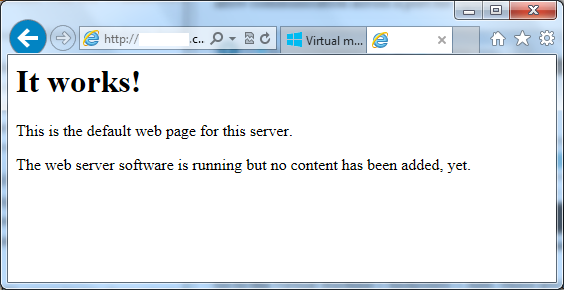
<html><body><h1>It works!</h1>
<p>This is the default web page for this server.</p>
<p>The web server software is running but no content has been added, yet.</p>
</body></html>

To start editing your index page, you can run:

$ sudo nano index.html

On Azure, you must create an endpoint for the Apache port. This opens the Azure firewall to allow communication across a port for Apache.

image

Go to the Virtual Machine > Endpoints > Add. These are the standard values: name: http, protocol: tcp, public port :80, private port: 80. Once you’ve created the endpoint, you can browse to your new Apache server.

image

Test your MySQL Install

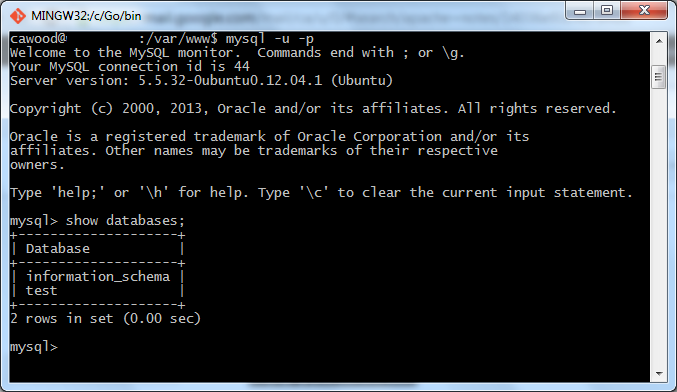
To make sure your MySQL install is working, simply run mysql and then type show databases; and press Enter. Couldn’t be easier. The result should look the window below.

image

Test PHP on your Server

Finally, to test your PHP install, you’ll need to create a file and then launch it in your favourite browser. Maybe because I'm nostalgic about the days of Pine, I’m a fan of the  GNU nano editor, so I use this command:

$ sudo nano /var/www/info.php

Add this content to the file:

<?php
phpinfo();
?>

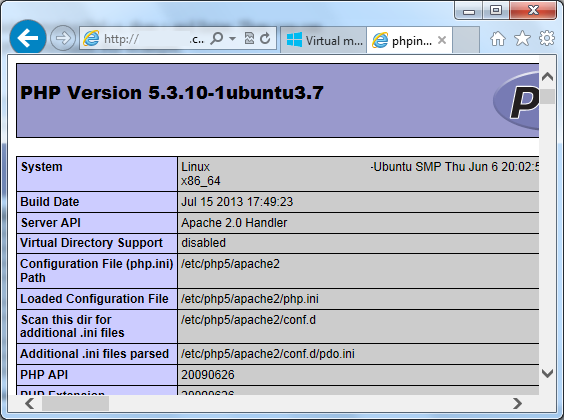
After you’ve made your changes, Save and Exit by typing Ctrl+x, then y and Enter. Then you can open the info.php page using your machine IP or DNS name. For example, http://myvm.cloudapp.net/info.php.

image


There you go. The LAMP stack running on Windows Azure.

Tuesday, August 13, 2013

Remote Access to Ubuntu Linux VM on Windows Azure

Previous post: Linux (Ubuntu) Virtual Machine on Windows Azure

I was getting ready to write a post about connecting remotely to Ubuntu running on Windows Azure, when I found this post: Remote Desktop to Ubuntu in Windows Azure. Unfortunately, it doesn’t work with Ubuntu 13.4 (Raring Ringtail); which just happens to be the image I choose to install in my virtual machine. Rather than wrestle with it any longer, I’ve decided to create a new VM using the Ubuntu 12.04 LTS Server (Precise Pangolin) image.

You may wonder why anyone would bother setting up remote access since you can SSH into the machine remotely and do everything through the command line. For me, the answer is quite simple, I want another way to connect in case something goes wrong. I’ve had VMs get into bad states (both one Amazon AWS EC2 and Windows Azure), so I’d like the option to connect as many ways as possible.

Note: I've used the Ubuntu 12.04 LTS server image since newer versions of the Ubuntu Unity desktop don't have a 2D mode and therefore are difficult to use with remote client software. If someone has the solution to this issue, please leave a comment.

[Update: Of course, you fist have to set up SSH: How to Use SSH with Linux on Windows Azure. You should create an SSH key first and associate the certificate (*.pem file) with the VM when you create the VM.]

To get remote access to 12.04, here are the steps:

1. Connect using SSH. I like the Git Bash terminal that comes with the Git install. PuTTY is also a good SSH client.

2. Install a desktop. This command will take a while, so get yourself a cup of joe... and feel free to make it a grande.

sudo apt-get install ubuntu-desktop

image

3. Install XRDP/ VNC Server.

sudo apt-get install xrdp

4. In the Azure Management Portal, create a VM endpoint for XRDP. 3389 is the default port.

5. Use the "Connect" button from the Azure portal to download an RDP shortcut for your VM.

image

6. Open the shortcut and login.

image

Here are a couple of other posts on this topic:
http://azurecoder.azurewebsites.net/tag/ssh-to-linux-virtual-machine/
http://www.liberiangeek.net/2012/05/connect-to-ubuntu-12-04-precise-pangolin-via-windows-remote-desktop/

Monday, April 29, 2013

Linux (Ubuntu) Virtual Machine on Windows Azure

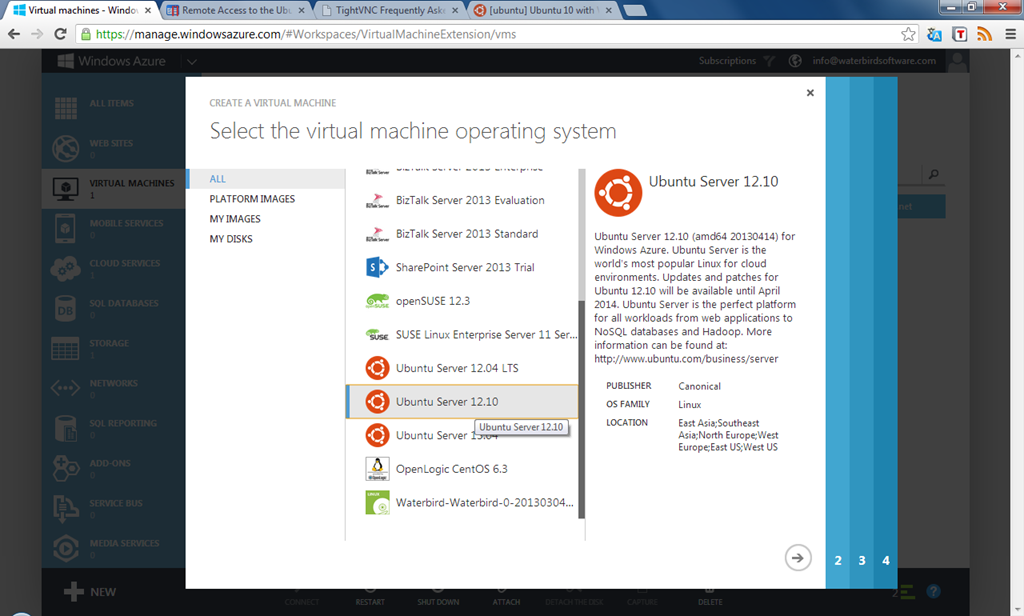
Creating (it’s hard to write “installing”) a Linux virtual machine on Windows Azure is remarkably simple. It’s just a matter of choosing the O/S and configuration you want from a gallery of options.

The whole process takes a few minutes and under the BizSpark start-up program, it’s possible to get access to Windows Azure for free.

AzureLinuxVMCreate
- choosing to create an Ubuntu virtual machine in Windows Azure

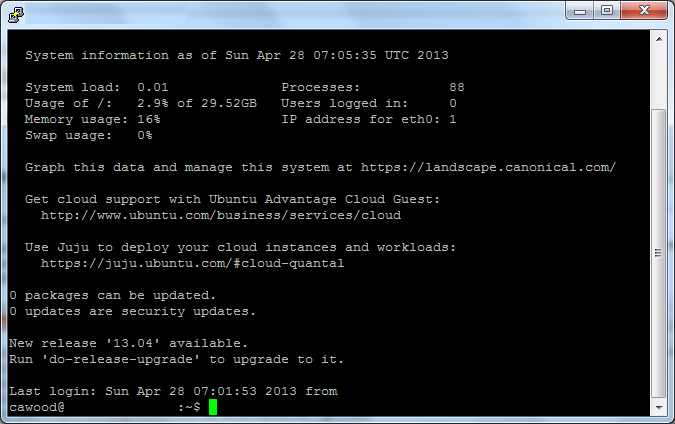
After creating the VM, you can connect easily from Windows by downloading PuTTy SSH.

PuttyConnected
- connecting to Linux on Azure using PuTTy

Full instructions for creating a Linux Virtual Machine on Windows Azure can be found on the Windows Azure website.

Wednesday, February 27, 2013

Running Mono 3.0.5 Beta on Windows

Mono is a really cool concept. It’s a C# compiler/framework that works cross-platform. C# is fantastic, so I really like the idea of being able to develop C# (potentially with Visual Studio) and target any device. Until Mono came along, C# was only used on Windows because it uses the Microsoft .NET framework. (Mono also boasts the MonoGame platform and the MonoDevelop IDE for Linux coding.)

image

Here is the introduction from the Mono Wikipedia page:

Mono is a free and open source project led by Xamarin (formerly by Novell and originally by Ximian) to create an Ecma standard compliant .NET Framework-compatible set of tools including, among others, a C# compiler and a Common Language Runtime.

The stated purpose of Mono is not only to be able to run Microsoft .NET applications cross-platform, but also to bring better development tools to Linux developers.[3] Mono can be run on many software systems including Android (and most other Linux distributions), BSD, iOS, OS X,Windows, Solaris, and some for game consoles such as PlayStation 3, Wii, and Xbox 360.”

So I downloaded Mono to try it out on Windows (I’ll try Ubuntu next) and I ran into an issue right away. Just trying to validate the install using the “Hello World” example on the Mono Basics page didn’t work. It’s really not that complicated, here’s the example program:

using System;
 
public class HelloWorld
{
    static public void Main ()
    {
        Console.WriteLine ("Hello Mono World");
    }
 
}

However, I couldn’t get it to work using the gmcs compiler that’s used in the example. The result was this all too common error:

C:\Mono\Mono-3.0.5>gmcs
'gmcs' is not recognized as an internal or external command, operable program or batch file.

image
This error will occur on Windows when the program actually doesn’t exist, or it can’t be discovered from the location that the console is running. There are two way to fix this issue for any Windows program:

1. Use the full path to the program and use quotes if the path has spaces in it

2. Add the path for the program to the Windows Environment Variable called “Path.”

So I tried to find the executable for gmcs, but I could not even find gmcs.bat or gmcs.exe. In this case, it wasn’t an issue with Windows or Mono, it was simply out of date documentation on the Mono site.

I received this helpful advice from the Mono user community forum, “Have you tried "mcs -sdk:2"? Mono 2.11 merged all the compilers into the one unified compiler, and now gmcs is a shell script that simply calls mcs (at least on Linux).” Ah, that’s good to know!

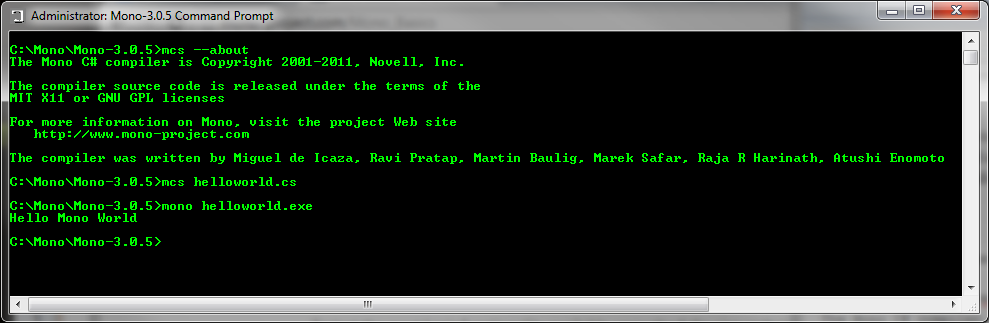
Here is the working version of the “basics” test code:

C:\Windows\System32>mcs --about
The Mono C# compiler is Copyright 2001-2011, Novell, Inc.
The compiler source code is released under the terms of the
MIT X11 or GNU GPL licenses
For more information on Mono, visit the project Web site
  
http://www.mono-project.com
The
compiler was written by Miguel de Icaza, Ravi Pratap, Martin Baulig, Marek Safar, Raja R Harinath, Atushi Enomoto

C:\Windows\System32>cd C:\Mono\Mono-3.0.5

C:\Mono\Mono-3.0.5>mcs helloworld.cs

C:\Mono\Mono-3.0.5>mono helloworld.exe
Hello Mono World

image

Success!